
How To Make Bone Broth 3 Ways – Stove Top, Pressure Cooker and Slow Cooker
Every week while growing up in my mum’s house there was always a pot of beef, chicken, pork or a mixture of bones simmering on the stove. The broth would turn into this gelatinous goop in the fridge that I thought was disgusting. This gelatinous goop once warmed up, turned into an amazing base for our noodle soups full of gut healing, immune boosting nutrients. Little did I know how nutritious this bone broth soup was and that I would be making it each week for my family.
|
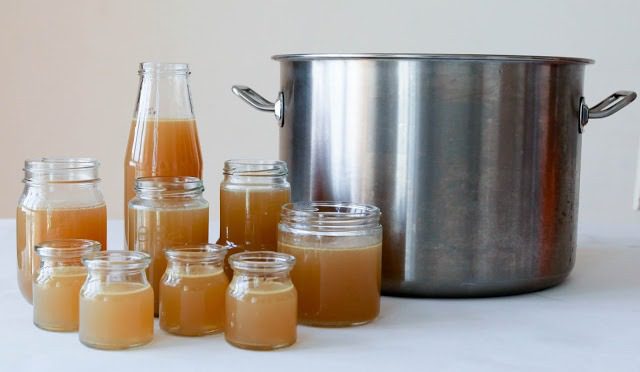
| 2 Day Chicken Bone Broth |
Making your own bone broth is easy and cheap. I like to save up all our bones, chicken carcasses and other bits like neck & feet and freeze them until I have enough for a pot. I really recommend this especially if you are paying a lot of money for organic free range meats, if they come with bones don’t toss them out.
- Healing the gut with nutritious gelatin that is drawn from the bones and supports proper digestion
- the gelatin also helps promote healthy hair and nail growth
- reduces join pain and inflammation from drawing out nutrients from the cartilage
- rich in calcium and magnesium for strong, healthy bones
- helps battle cold and flu viruses (chicken soup does cure everything 😉
[Update April 2016] – If you have been following me on Instagram or Facebook you will have seen my #makebonebrothtasty posts. I have been battling an autoimmune disorder and my Holistic Doctor has prescribed bone broth 3 times a day. I found it hard to fit in on top of meals so I’ve made bone broth my main meal. After the first week I already experienced an improvement in my fatigue and joint pain, although not entirely cleared, I am more functional. In between I’m sticking to juices and fresh vegetables and some fruit.
 |
| #makingbonebrothbeautiful – this bone broth was chinese cabbage, pumpkin flowers and garlic |
I started #makebonebrothtasty for a few reasons. I was quite down with my current situation as my fatigue was so severe I was not leaving the house, I also was not able to work on new recipes which requires a lot of taste testing. I decided to make the most of what I could have, which was bone broth. So each day I’m creating a new way to have my bone broth and styling the bone broth soup so I can feel like I’m creating something! This has been such a healing and fun process. It has also been very easy to follow, I’m grateful I already had some of the knowledge on eating the right foods so the transition was quite easy.
 |
| #makingbonebrothbeautiful – Asparagus, garlic & onion bone broth. All Sulfur rich foods to help repair joint damage <3 |
I found having bone broth meals 3 times a daily very convenient and cheap. I was making a weekly batch of broth using the stove top method as I have a mega large pot and stored the broth in the freezer to take out each day to thaw. Since I have so much bone broth now, I am making a fresh pressure cooker batch daily instead as it keeps the stove free and the kitchen cooler.
Each day I throw in any veggies and herbs I have on hand and divide the portions into 3 thermos so they stay hot all day. I don’t have to worry about meals for the rest of the day except my kids. I don’t expect everyone would enjoy only bone broth soups 3 times a day, I’m doing this out of necessity but I think if you could do this for 1 meal a day, it would be wonderful for your body and pocket 😉
There are so many ways you can make bone broth, with different mixes of bones or adding herbs and spices. Using the stove, pressure cooker or slow cooker. I’m going to list all 3 ways below so you can pick and choose which ever works best for you.
Before I head to the recipe, I know some of my friends cannot stomach the idea of dealing with chicken feet or heads. I grew up appreciating the whole animal, we used every part and nothing goes to waste then I moved out and did my own shopping at the supermarket where trays and trays of perfectly butchered meat lay. We bought mindless amounts of meat and probably ate more than we needed to as the options to get only the breast or only the thighs were very convenient. I really love living here in Vietnam as I don’t have access to this convenience and order my chickens fresh from the country side. I’ve gone back to using the whole animal and we get so many extras like feet, necks, heads and organ meats. I can make more meals with the whole animal. There is also zero packaging (no plastic trays, no plastic wrap and no soaking pads under the meat), so if you have access to getting whole organic free range chickens I really suggest giving it a go if you aren’t already 🙂
BONE BROTH ON THE STOVE (UP TO 2 DAYS ON THE STOVE)
 |
| 2 Day Chicken Bone Broth – save up all your carcasses and chicken bits in the freezer |
- about 2kg-4kg (depending on size of pot) chicken carcasses, feet, necks. You can add any other bones you have saved up after meal times too (beef or pork bones although the flavour won’t be as light as chicken bones on it’s own)
- 2 tbsp apple cider vinegar (I use this one)
- 1 tbsp natural sea salt
- enough filtered water to cover the bones (I used about 7 litres for this pot with about 2.5kg of bones)
- a really big pot
 |
| 2 Day Chicken Bone Broth – add enough water to cover the bones |
- add all the bones to a big enough pot to be able to submerge them in water (you can par boil the bones to remove extra scum and smell by discarding the first lot of water once it boils)
- add the apple cider vinegar and salt
- add the water to cover the bones
- cover and bring to boil
- reduce to a very light simmer and partially cover(you should only notice a few gentle bubbles on the surface)
- skim any of the frothy scum off the top and continue to do this every couple hours until there is none
- you can start using the broth after around 3 hours for this large pot (if using a smaller pot and less bones, you can start a little earlier) leave on the stove all day on the low simmer, if you are worried to leave it on at night you can turn the stove off just before bed then turn it back on as soon as you wake
- my electric stove turns off by itself during the night so I just turn it back on in the morning
- repeat the next day if you wish for a deeper broth
- some of the water should have reduced by now and the bones become soft and easy to break apart
- allow to cool and strain into some glass jars (I use recycled glass jars of different sizes and a few small ones that are about 1/2 cup size which is great for cooking)
- once cooled, freeze until needed for about 2 months or refrigerate for about 7 days (I notice the layer of fat on the top seals the broth and it can keep for a lot longer in the fridge than 7 days)
- using single serve size jars makes it easy to just defrost enough for the day
- this recipe is best for a weekend when you just plan to be home all day, otherwise you can try it in the slow cooker or the pressure cooker (see below)
- Once you have bone broth in the freezer, you can make quick nutritious meals with the bone broth by reheating the broth with your favourite veggies or drop an egg in or shred any meat off the bones. (scroll down for some bone broth inspo)
PRESSURE COOKER BONE BROTH
- Add enough bones to sit under the maximum fill line for the pressure cooker (1-2 kgs depending on how they are cut – don’t overfill to avoid any explosions!)
- Add 1tbsp of apple cider vinegar
- 1 tbsp natural sea salt
- 1 small onion halved or sliced (optional)
- 2 cloves of garlic peeled (optional)
- Add enough filtered water to cover the bones
- Set the pressure cooker to high for 45 minutes
- Allow the cooker to release the pressure naturally
- Once cooled, divide into glass containers and refrigerate for 7 days or freeze for 2 months until needed
 |
| The pressure cooker version is probably my favourite now since I have been consuming broth as my meals 3 times a day. |
SLOW COOKER BONE BROTH
Use any bones you like, we use pork and chicken mostly at home and I do not any other herbs or vegetables so I can use the broth in many different dishes. Just remember to add some apple cider vinegar and salt.
- Add enough bones to sit under the maximum fill line
- Add 1 tbsp of apple cider vinegar
- 1 tbsp natural sea salt
- 1 small onion halved or sliced (optional)
- 2 cloves of garlic peeled (optional)
- Add enough filtered water to cover the bones
- Set the slow cooker to 8 hours (or the maximum) then reset again for another 8 hours (or the maximum) I do this twice as I find I get a richer more gelatinous broth.
- Once cooled, strain and divide into glass containers or jar and freeze until needed
Hope you enjoy the amazing benefits of bone broth and don’t forget to check out my recipes page (here) for the different recipes using bone broth 🙂
Here are some bone broth soup ideas, all you need to do is heat up the broth with your favourite veggies
 |
| One of childrens favourite, diced carrot and ginger |
 |
| Bone broth soup with Chinese cabbage, diced carrots and ginger |
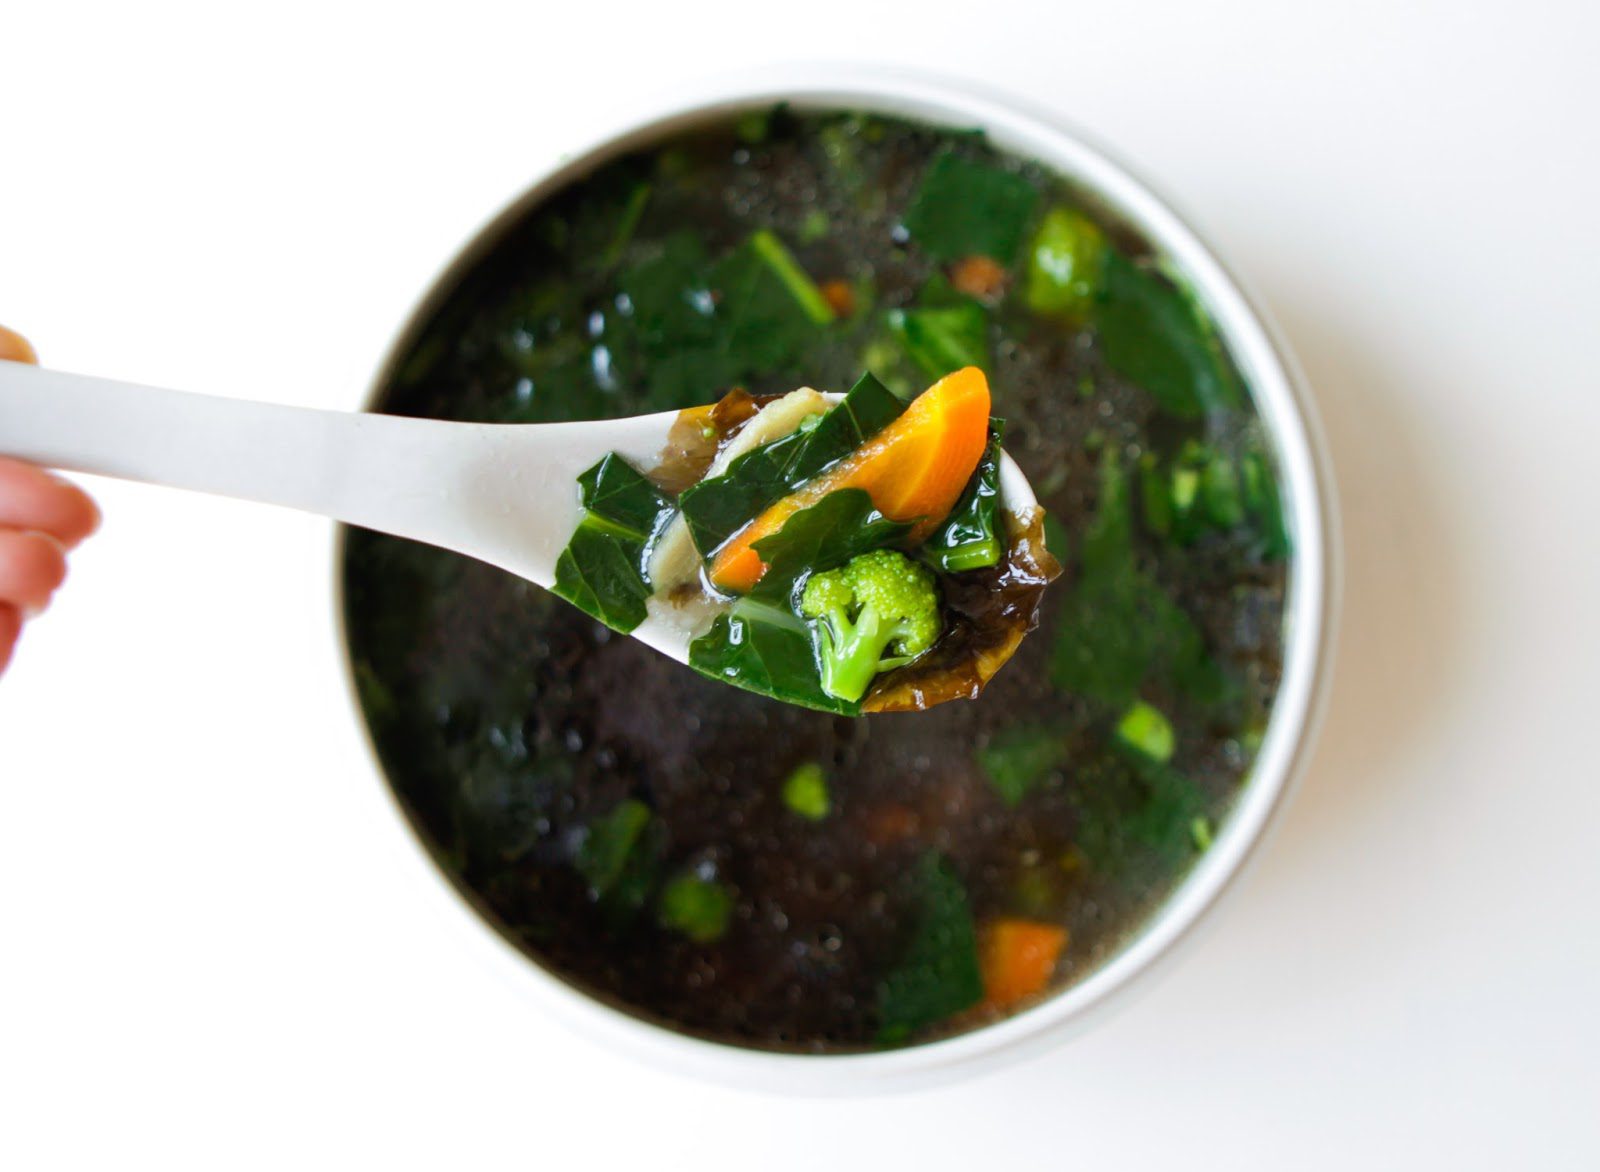 |
| Bone broth soup with Chinese broccoli, carrot, ginger and nori |
 |
| Sulfur rich veggies with asparagus, onion & garlic which is also great for joints |
 |
| Bone broth soup with lotus root and jujubes |
 |
| Pumpkin, ginger & coriander bone broth – one of my favourites! |
If you like this recipe, please leave me a comment, like or share this post, it really helps me out 🙂
- about 2kg-4kg (depending on size of pot) chicken carcasses, feet, necks. You can add any other bones you have saved up after meal times too (beef or pork bones although the flavour won't be as light as chicken bones on it's own)
- 2 tbsp apple cider vinegar (I use this one)
- 1 tbsp natural sea salt
- enough filtered water to cover the bones (I used about 7 litres for this pot with about 2.5kg of bones)
- a really big pot
- add all the bones to a big enough pot to be able to submerge them in water (you can par boil the bones to remove extra scum and smell by discarding the first lot of water once it boils)
- add the apple cider vinegar and salt
- add the water to cover the bones
- cover and bring to boil
- reduce to a very light simmer and partially cover(you should only notice a few gentle bubbles on the surface)
- skim any of the frothy scum off the top and continue to do this every couple hours until there is none
- you can start using the broth after around 3 hours for this large pot (if using a smaller pot and less bones, you can start a little earlier) leave on the stove all day on the low simmer, if you are worried to leave it on at night you can turn the stove off just before bed then turn it back on as soon as you wake
- my electric stove turns off by itself during the night so I just turn it back on in the morning
- repeat the next day if you wish for a deeper broth
- some of the water should have reduced by now and the bones become soft and easy to break apart
- allow to cool and strain into some glass jars (I use recycled glass jars of different sizes and a few small ones that are about ½ cup size which is great for cooking)
- once cooled, freeze until needed for about 2 months or refrigerate for about 7 days (I notice the layer of fat on the top seals the broth and it can keep for a lot longer in the fridge than 7 days)
- using single serve size jars makes it easy to just defrost enough for the day
- this recipe is best for a weekend when you just plan to be home all day, otherwise you can try it in the slow cooker or the pressure cooker (see below)
- Once you have bone broth in the freezer, you can make quick nutritious meals with the bone broth by reheating the broth with your favourite veggies or drop an egg in or shred any meat off the bones. (scroll down for some bone broth inspo)
